Experiments with crochet casting

The challenge of the last piece of casting, ironically this was the first interview I conducted was one of the most technical pieces I made.  The problem with this was finding a release agent that would allow for the fibres of the crocheted dolly to release yet maintain the print of the yarn within the silicone.  I tried a number of release agents, saturating the yarn with it, paint, epoxy resin, vaseline, wax spray and beeswax.  When I moved onto wax, it was only when the crochet sample was fully immersed within it and it was completely saturated that the silicone started to budge.  I found out that the wax would fill the yarn and still leave the detail of the stitches, but this had to be done in one pour to keep the stitches visible, otherwise they got masked.  After a number of failed experiments it was so good to finally work out the right method to preserve the detail.

Casting trainers and a whole lot of silicone!

The last few days have been really interesting and exciting with lots of highs and lows. The trainers were the one object I have been scared of producing as they are something that was out of my comfort zone and used about £200 worth of silicone which again made me worry about getting it “right”.

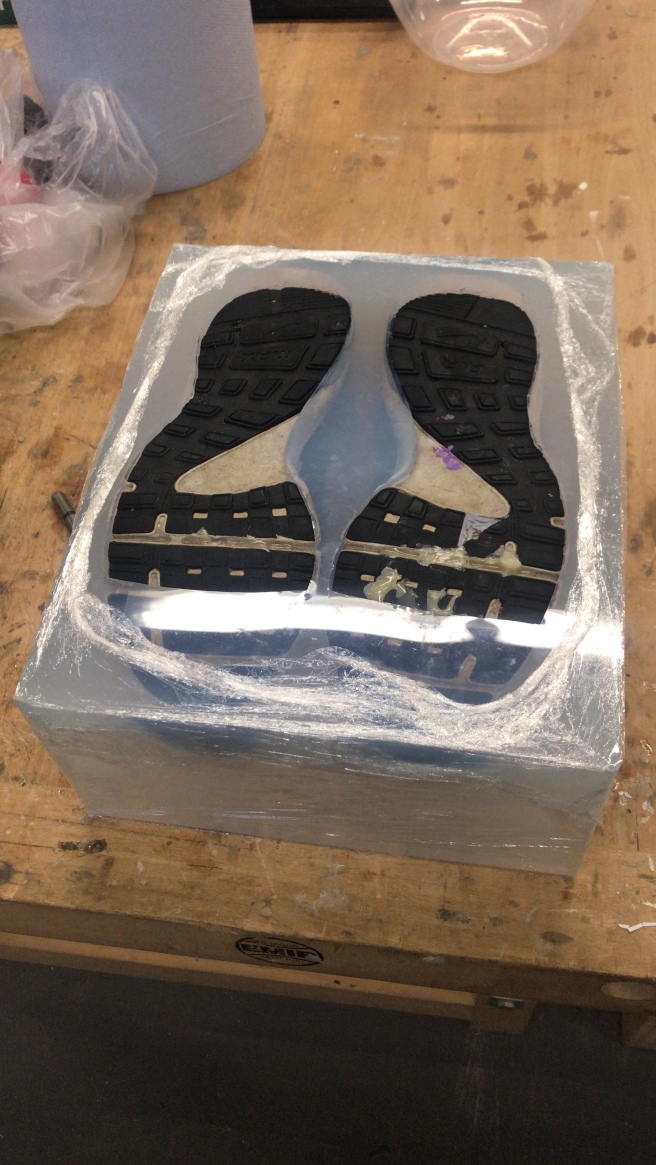
The beginning of the process went well, prepping the shoes ready to be cast. I filled in the majority of the trainer where the foot would go to stop it collapsing in under the weight of the silicone and capped with plasticine as this still allows the silicone to go off rather than stay sticky.

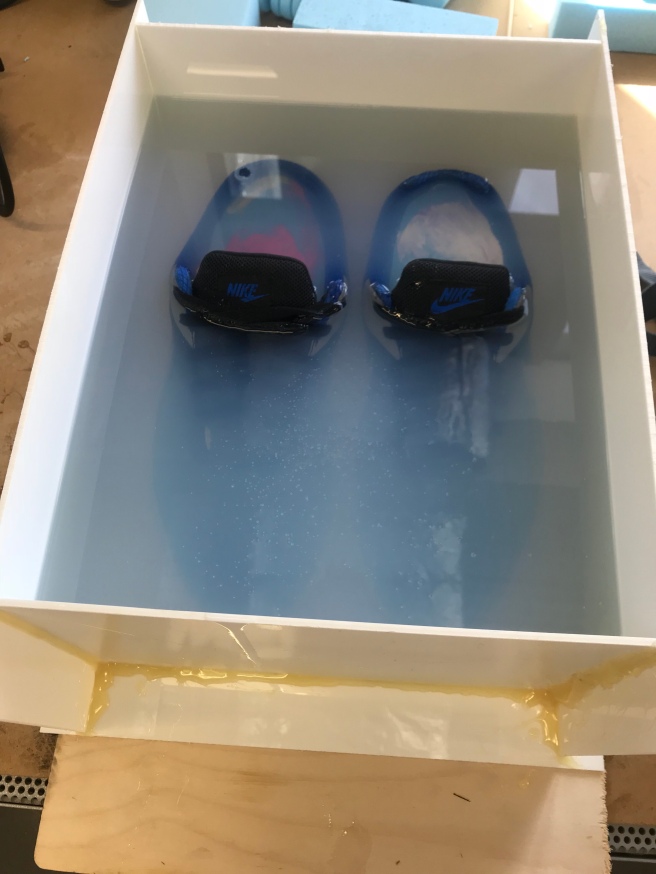
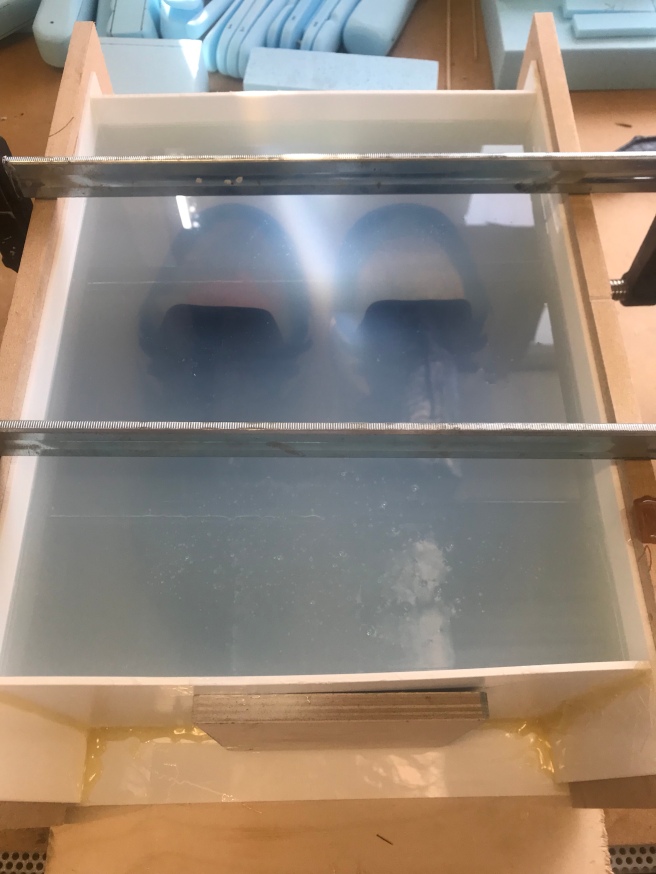
Gluing the shoes to the base of the box so they wouldn’t float in the silicone, I then created the box around and glued it into place. This left the shiny surface for the silicone to stick to but give a clear outer finish. I thought I was going to cast the piece over a few days but having spoken to the technician, he recommended me pouring it all in one day. This worried me as I haven’t worked in such a large scale. I ended up doing 4 pours, 3kg, 4kg, 1.5kg and 2kg. This allowed me to judge how much I needed and not over cater as its expensive stuff! It felt so good to have done the whole pour on one day. The box needed clamping to stop it bowing out under the weight and it worked well.

The next morning I came in and the block had cured! It was so heavy, but by carefully splitting down the glue on the box I peeled off the outer frame to reveal the block. Turning the block over to see the soles of the shoes revealed how much had soaked underneath and showed where I should cut back the silicone to. It quickly became apparent that I would need to chop out the shoes piece by piece rather than being able to pull them out. This is because of the type of textile that the trainers are made from stuck in different places due to it porous nature and texture. Some sections such as the laces were completely embedded and unfortunately in removing the shoes some of the laces pulled out the silicone and ripped. This annoyed me as I like to get a perfect mould, but the more I thought about this, the struggle is synonymous with the relationship (this piece was based around a story of lost love, a boyfriend who ended up completely disappearing when then relationship finished and that the end was hard and a struggle. Also where the elements had ripped, it resembles how the end of the relationship felt and that a piece is now missing and the participant feels she has lost a friend as well as he disconnected from all her social media and life. He was ripped out of her life.

Also the opacity was not as clear as I’d hoped. Probably because there was so much silicone. Until I get them fully out and clean it up I won’t know, but hopefully it will be more clear when I get them totally out and can finish the object.

The shoes are still being stubborn and taking a while to get out. Hopefully I will feel better about the piece when they are well and truly out!

Silicone experiments on wool

So annoyingly I am still having trouble trying to cast wool samples and get it to release.  It’s frustrating as I have tried all sorts of release agents, other stuff like epoxy to harden it, it never seems to go right.  I have to cast the toilet dolly at some point soon too and unless I find the right thing she’s going to be stuck in their forever!

Heavy leather (Wet moulding suitcase)

I tried this as an experiment, because it felt the right thing to do.  I had build the box base and sanded it down ready to make the lid, but it felt too wooden….So I decided, having some 4mm leather in stock (I think I bought this by accident a few years ago) that I would spontaniously, at 10pm at night try wet moulding.  I had done this in my MA, albeit with thinner leather, but the way leather goes when it is wet is amazing.  Veg tan as a natural leather goes floppy.  It allows you to manipulate it round curves or moulds and sets in that position.

Using the base I soaked the right sized leather in warm water for about 10 minutes.  I then patted off the majority of the moisture and positioned it over the top of the wooden box (wrapped in cling film).  With my hands I moulded the leather around the curved edges of the box and smoothed it into place.  Wrapping the whole thing in clingfilm and securing the edges down with masking tape and adding pressure using wood and tape I left it to dry for 48 hours.

Being a thicker piece of leather than I normally work with, I used my friends stitch markers to create the stitch holes as mine would be too close together.  It punched out well and is now ready for stitching.  The side pieces were cut in relation to the curve and stitches again were marked ready to be sewn.  These are not all teh way through, but an awl was used to create a 45 degree angle on them to do a box stitch on the leather.  I have ordered thicker linen thread so I am looking forward to stitching this as soon as it arrives!

An Exhibition

Having applied for an exhibition at Dean Clough, I met with the Art Director and showed him a few of my artefacts.  He liked the concept and the idea and offered me a space in the converted bookshop that is currently hosting another small exhibit.

It has encouraged me to finish the pieces for a deadline, which is something that is helpful to me.  If I have something to work towards then I can plan my time accordingly.  I have now three of the larger objects to complete, each involving a large hand stitched or cast element with skills that are my own but need to be developed from the level I currently have.

Having viewed the space I came up with some ideas to have sections of the story on the displays, however in discussion we touched upon the 1960s art and language movement.  This is something I need to do further exploration into.

Thinking about my work involving distillations of stories into artefacts, or stories to inform the making process I have to be careful not to be too literal when displaying this.  The text could eclipse the artefact first and foremost, meaning that the viewer would read the text and only take away ‘my’ version of it, rather than thinking of their own story about it.  It may invalidate their experience of the artefact.  They may have their own story and emotional memory that links to brass shoes, or a football or rolling pin that they remember when looking at the pieces.  It is the job of the artefact to convey their own emotion and memory as much as the people who told the story in the first place.  What the audience contribute to the piece has its own validity.  This will be important to capture other peoples views on the work and their own experiences.  May be a box or wall to pin thoughts….?

I must remember that my artefacts are not simply a distillation of the story, but they open up other concepts.  A couple of diagrams that I have thought about to explain how the work is viewed are below.

The first shows how a story could be told including many different elements, but the core details are distilled down and utilised in the making process.  Some of these details are things that are recognisable and can be visualised in the finished artefact, others are elements that aren’t seen but inform the making process.  Out the other end, the artefact then has the core details embedded within it but also disperses other meaning to the onlooker where they read into their own ideas and concepts, memories and emotions of a particular person or object or experience.

IMG_5963

The second shows how the artefact is in the middle and onlookers have totally different experiences of that same object, so like a venn diagram, elements of each persons experience overlaps at the point of the object but then different ideas, thoughts and stories are felt and experienced from it.

img_5965.jpg

From the exhibition I would like to see how participants see the exhibition and ask them to comment on what they felt seeing the object and what they felt, but also see what other people say about the objects and how they feel, if they can relate to them as well.

I’m excited but nervous!!!!

Why I Stopped Filming

At the beginning of my PhD journey I felt that I wanted to record the journey in film and create little film montages for each object of the process.  This was for one reason, because I like the idea of being able to witness the process but also because my project was trying to capture whether emotions could be embedded within the object I wanted people to see this too.

Having discussed with my supervisors and thought about this, the filming has wained and dropped off.  Not completely, but partially with the latter objects.  It hasn’t felt as necessary to capture the process.  I still take still pictures of the different stages that I will utilise, but the moving image somewhat hampers the experience.  With filming I am always conscious that I need to make sure that my hands and the thing I’m working on is in shot and people will be able to see what is going on.  Kind of framing it for an audience.  This is something that doesn’t link with my PhD idea of transmission of emotions and so actually creating the videos doesn’t feel fully part of it.  Also creating the videos means I have less time to spend on my making and when the objects are displayed in an exhibition I want people to look at these and spend time contemplating the finished pieces rather than looking at the videos, that with my skill may not be as well produced as they could be, meaning again that it takes away from the overall finished feel of the exhibition.

Therefore I am just focussing on my making and the stories that I have to transfer into the pieces at the moment so I don’t get distracted by the camera.  I may set it up in the background for some things but not in a way that it is invasive to the project.  I’ve found it interesting coming to this conclusion as a thing that I thought would be integral to the project actually has ended up being something that could have hampered the project in the end.


Bag Stitching continues…..

When I decided to create this bag by hand I thought it would take a while, but I hadn’t anticipated the amount of thought and desicison making that goes into the construction of a hand stitched bag.  When machining I just ‘go for it’ but the position of the stitching, making sure all the stitches fit in place, making sure the thread doesn’t get spliced all has to be thought about.  The bag stitching takes time but it’s amazing to look at it now and see that it’s starting to resemble a 3D shape and a real bag!  The lining, as seen above is a patchwork of pages of the participants mothers RAF training note book.  She was a keen make do and mender and utilised all sorts of things after their first life was over.  Including making patchwork bags out of old clothes.  The lining is a patch work to symbolise that and the bag resembles the style of bag her mother used to carry.  She remembers it smelling of fountain pen ink and leather.

So I reckon a few more nights of stitching (I watched the whole Back to the Future trilogy whilst stitching the lining and the flap).

It’s really given me time to reflect on the story and think about the participant in this piece.  I’ve really enjoyed the hand made process so far.

img_5901.jpg

IMG_5928